|
| Picture of the robot
|
Constructing the robot
My first intention was to just build a robot and design
as I built it. When I got the RIS i realized that it
wasn't going to be such a trivial task, so I just built
on of the basic models from the Legos Constructopedia
book, the one called Roverbot. Testing the robot i realized
that it would run most smoothly with tracks.
I also added the bumper to the robot to detect collisions,
but it isn't really used by the Matlab-programs.
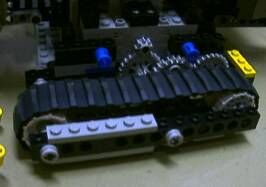
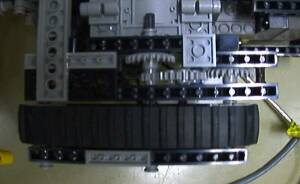
The tracks
As I couldn't
make the Matlab program run really fastly I decided to make
the robot a bit slower instead. The tracks in the Constructopedia
have a ratio of 1:3 from motor to the tracks, but i edited
them by adding another gears in between giving the ratio of
1:9. These pictures should give some hints about how I did it:
 |
 |
| The modified tracks |
The modified tracks seen from below
|
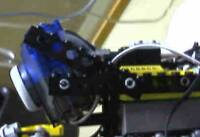
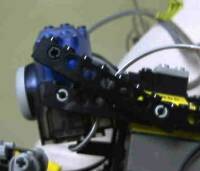
Attaching the camera
I used two different positions for the camera, one for
following a line and another for detecting objects
and following a trolley. In the line-following-position
the camera points more down so that the robot 'sees' thing
that are really near the bumper.
 |
 |
 |
| Camera in line-following-position |
Camera in the other position |
Vision field of the robot, object detection |
|
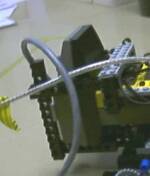
| The IR-tower attached to rear the robot
|
The IR-communication
My idea at first was to have the IR-tower staticly somewhere
above the robot so that the communication between the PC and
the robot could be wireless. After some testing i realized that
messages sent from the robot to the PC were easily lost
even though i did put a reflecting plate in front of the
robots IR-sender to help the communication. As i still had
to have the USB-cable for the camera i decided to just skip
the wireless communication. Attaching the IR-tower to the robot
was the easiest way to do this, and that's what I did.
Ugly, but it works. :) I also connected a longer cable to the
IR-tower, and I use 2 wires in the same cable to feed the 9 V power
to the tower and the 'Brick'.
Using an external power source
The RIS I use is of version 1.5, so it has no plug for
external power source. Changing batteries sucks, so I
simply opened the 'Brick' and attached wires to the
points where the 'batterybox' is connected. This
was a quite easy operation, but I take no responsibility
if You brake your RIS-brick trying to do it. :) I use
an AC/DC adaptor with 9 V / 300 mA output to feed the
IR-tower and the robot, and it seems to be powerful enough.
|